Embracing a DIY project can often seem daunting, but with the right guidance and a sprinkle of determination, enhancing your home’s aesthetic with your own two hands is thoroughly achievable. Today, we’re delving into the realm of DIY trim installation, where the subtle detail of trim can redefine a room’s character, giving it a refined, complete look. Whether you’re sprucing up an old space or putting the finishing touches on a new one, our easy trim installation guide will support you through every step of the process.
From the initial selection to the final stroke of paint, these trim installation tips are designed to ensure a smooth experience. We understand the nuances that can transform a task into an art form when you’re learning how to install trim. With our DIY trim guide, you’ll not only accomplish your project but also enjoy the creative journey. Let’s roll up our sleeves and dive into a world where precision meets elegance, where each cut and nail brings your envisioned design to life.
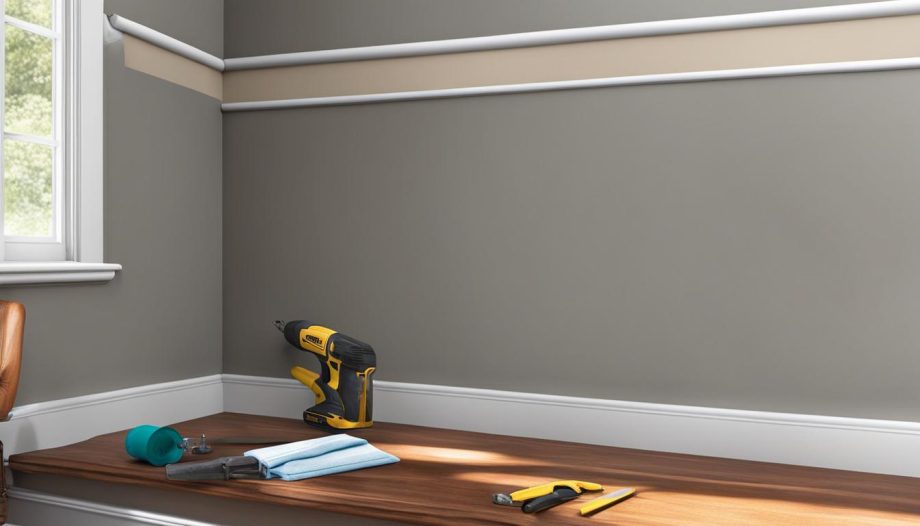
Show a step-by-step process of installing trim on a wall. Incorporate tools such as a measuring tape, level, saw, and nail gun. Use bright colors to emphasize the progress and make it easy to follow. Add shadows to give a 3D effect and make the image more realistic.
Essential Tools and Materials for Installing Trim
Embarking on a trim installation project requires a well-prepared toolkit. High precision tools and quality materials are pivotal for ensuring that installing window trim, door trim, and other types of moldings are executed with professional fineship.
Measuring for Precision
A reliable tape measure is the cornerstone of trim installation. It is essential to measure each wall multiple times to ensure precision before cutting any materials. This crucial step greatly influences the outcome of your step-by-step trim installation.
Choosing the Right Trim Style
When selecting trim, the room’s ceiling height must be taken into account. Wider trim may be suitable for tall ceilings, while standard heights often pair well with more narrow trim options, defining the visual continuity of the installing door trim and window trim.
Transport and Acclimatization
Attention to detail is necessary during the transport and acclimatization phase. The baseboard trim should be moved into the installation space a few days ahead of the project to adjust to the room’s temperature and humidity, preventing future warping or misalignments.
Miter Saw: The Versatile Cutting Tool
A miter saw or a miter box is indispensable for accurate cuts, making it a critical component of any trim installation tutorial. This tool ensures that every corner, angle, and joint fits seamlessly, specifically in complex components like window and door trims.
Securing the Trim: Nails and Adhesives
The final touch in affixing the trim firmly to walls requires the use of a brad nailer in conjunction with wood glue. Nails, a caulk gun, and adhesive cartridges also play a substantial role in this process, guaranteeing a secure and neat installation.
| Tool/Material | Use | Notes |
|---|---|---|
| Tape Measure | Measuring lengths | Measure walls at least twice for accuracy |
| Trim (Baseboard, Cap, Shoe Moulding) | Visual enhancement and protection | Choose based on room size and design preference |
| Miter Saw/Miter Box | Cutting precise angles | Crucial for corner fitting and detailed cuts |
| Brad Nailer | Securing trim to walls | Helps maintain the visual clean lines of trim |
| Wood Glue | Additional hold for trim pieces | Apply on joints for extra firmness |
| Adhesive, Caulk | Finishing touches | Seals and hides the imperfections, if any |
Preparing Your Space for Trim Installation
Before embarking on your step-by-step trim installation project, it’s crucial to properly prepare your space. This DIY trim guide outlines key preparation steps to ensure a smooth and successful installation.
- Begin by bringing your baseboards into the installation room to adapt to the room’s climate. This helps prevent material expansion or contraction post-installation.
- Next, precisely measure the walls where the trim will be installed. Remember to add extra length for those critical outside corner cuts to assure a professional finish.
- Consider painting your baseboards before installation. This step is not just about aesthetics; it can significantly streamline the entire process.
- Use a stud finder to locate and mark all wall studs. These markings will guide you to the strongest anchor points for your new trim.
- Lastly, ascertain the levelness of your floor with a 4-foot level. Should you encounter inconsistencies, use the lowest point to set a uniform height for your baseboard installation.
Each of these preparatory actions plays a pivotal role in the installation of your trim. By following these guidelines, you’ll be set for an efficient and visually pleasing job.
Armed with these preparations, you’ll find that the actual installation of the trim becomes a more straightforward and satisfying DIY task. Now that your space is primed and ready, you can proceed with confidence, knowing you’ve set the stage for excellent results. Happy trimming!
Installing Trim: The Step-by-Step Process
Embarking on a DIY trim installation journey can transform your home’s aesthetics with precision and elegance. Whether you’re tackling the challenge of installing window trim or looking to redefine the look of your doorways, understanding the fundamentals of trim setup is crucial. Here’s a streamlined guide to help you navigate through the proper techniques and best practices for installing trim, all while ensuring your DIY project mirrors that of a professional standard.
Removing Existing Baseboards
The first course of action in your trim installation tutorial is to carefully remove any pre-existing baseboards. Exercise diligence in cutting through the existing layers of paint and caulk, and employ the right tools for prying the trim off without inflicting harm on your walls. A clean slate is essential for a flawless installation.
Leveling and Measuring
Before you can proceed to the intricacies of cutting and fitting, ensuring that the floor is leveled is a must. Utilize this steady foundation to determine the proper height and alignment of your baseboards, making measurement a top priority in the pursuit of perfection. Accurate measurements now mean less room for error later on.
Creating Seamless Corner Joints
The artistry of trim installation is evident when it comes to the corners. The goal here is to create seamless transitions—outside corners demand precise mitered cuts, while inside corners are best managed through coping techniques. Mastery of scarf and butt joints plays a pivotal role in facilitating a continuous and harmonious trim line.
Attaching and Finishing the Baseboards
Finally, securing your trim with finishing nails anchors your craftsmanship as you ensure they are fixed in place, straight and properly aligned. Complement your work with additional moulding features, such as shoe or cap moulding for enhanced details. Seal the deal with caulking and a definitive top coat of paint, filling in any gaps, and lending a smooth, professional finish to your DIY trim installation. The reward is a space redefined with character and architectural depth, a testament to your skillful work.