Embarking on a DIY subfloor painting project is the gateway to transforming an ordinary space into an extraordinary one. It’s not merely an artistic endeavor—it’s a practical and cost-effective way to revamp your living area. But how to paint subfloor with results that mirror professional work? It hinges on preparation, the right materials, and a methodical approach.
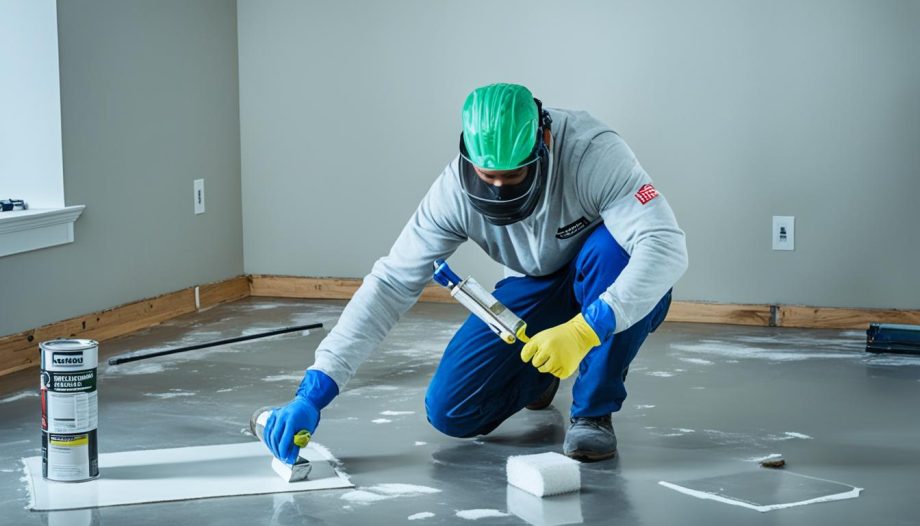
A person wearing protective gear painting a subfloor with a roller brush. The subfloor is prepped with a primer and the person is working in a well-ventilated area. Nearby, there are open paint cans and masking tape ready for use.
Preparation begins with eliminating old carpet and padding, then meticulously continues with the removal of staples and tack strips. The next transformation phase includes sanding down rough areas and applying a reliable Zinsser primer to set the stage for the main act—painting. Choosing the right paint is crucial, and that’s where quality porch and floor paints come into play for their durability and vibrant colors.
Once your subfloor is painted, it should reflect your unique style and stand up to the daily parade of footsteps. For those seeking painted subfloor ideas or simply a fresh look without breaking the bank, this project could be your next DIY success. Keep reading to uncover the secrets to achieving a beautifully painted subfloor that lasts.
Prepping Your Subfloor for a Fresh Coat
When it comes to a DIY transformation, the importance of thorough subfloor preparation before painting cannot be overstated. It is the foundation upon which a resilient and visually appealing paint job is built. Let’s dive into the essential steps for prepping your subfloor to ensure the best results for your upcoming painting project.
Removing Old Carpet and Staples
Before you can think of brandishing a paintbrush, the old carpet needs to go. By using common tools such as a utility knife, pry bar, and hammer, you can effectively free your subfloor of its aged carpet covering. Once the carpet is out of the way, there’s the task of meticulously removing the countless staples that once secured it. Needle-nose pliers and a reliable staple remover will be your best allies in achieving a clean and clear surface. This is one of the crucial tips for painting subfloor – never skip on eliminating every last staple for a truly smooth finish.
Filling Seams and Holes with the Right Filler
Next, your attention should turn to the imperfections scattered across your subfloor. Using a suitable filler like DAP Presto Patch Filler can make all the difference. Not only does it fill the gouges and smooth out seams, but it’s also designed for easy sanding, allowing you to create the perfect base to welcome the best paint for subfloor application.
Sanding the Surface for Optimal Paint Adherence
The act of sanding transforms your subfloor from a rough and tumble surface to a smooth canvas ready for a striking coat of paint. Whether using an orbital sander or enlisting the heft of a floor sander, a uniform sanding job is essential. This is where your preparation pays off – in creating a bond between the wood and primer that sets the stage for top-notch subfloor paint options.
| Preparation Step | Tools Required | Best Practice Tips |
|---|---|---|
| Carpet and Staple Removal | Utility knife, Pry bar, Hammer, Needle-nose pliers, Heavy-duty staple remover | Check for and remove all staples and tack strips to ensure a bare surface. |
| Filling Seams and Holes | Putty knife, DAP Presto Patch Filler | Apply the filler evenly and ensure it is compatible with sanding for a smooth finish. |
| Sanding | Orbital sander, Floor sander (for larger areas), Sandpaper | Evenly sand the entire area; pay particular attention to rough spots and filler patches. |
In preparing for the transformative journey from worn subfloor to a polished, painted floor, remember that every step in the preparation phase is an investment in the final outcome. Adherence to these guidelines not only ensures a stronger, more durable painted surface but also imbues your work with a professional touch that can stand the test of time.
Choosing the Best Paint for Your Subfloor
When you’re ready to turn your subfloor into a work of art, the right choice in paint can make all the difference. With painted subfloor ideas booming in popularity, selecting the perfect subfloor paint colors is not just a practical decision but a way to express your unique style. Whether aiming for the clean, crisp lines of modern design or seeking a warm, rustic look, you’ll find that special porch and floor paints offer the durability and aesthetic flexibility needed for your space.
Valspar Porch and Floor Paint stands out as a reliable option, known for its rugged latex-based formula that elegantly partners with oil-based primers. A generous selection of over 75 colors gives you the freedom to personalize your subfloor—so whether you prefer the calm of ocean blues or the vibrancy of sunset oranges, there’s a hue for you. Let’s look at how you can achieve the best results with your chosen paint:
- Prepare the subfloor properly by cleaning and priming to ensure maximum paint adhesion and longevity.
- Choose high-quality painting tools: a rough surface paint roller for the main areas and an angled brush for cutting in at the edges guarantee a professional finish.
- Select colors that complement the overall theme of your room. With over 75 Valspar colors available, the perfect shade to match your decor awaits.
- Consider the lighting in your room, as this can significantly affect how the paint color appears once applied.
To help you envision the final look, here’s a visual representation of some popular color choices and why they might be the perfect fit for your home:
| Color | Style | Best for |
|---|---|---|
| Classic White | Crisp and Clean | Spaces seeking a bright and airy feel |
| Rugged Gray | Modern and Industrial | Lofts and contemporary homes |
| Deep Blue | Calm and Soothing | Bedrooms and bathrooms |
| Rustic Red | Warm and Inviting | Kitchens and dining areas |
Keep in mind that the paint you select is more than just a color; it’s the foundation of your floor’s new life. With the proper choice and application, your painted subfloor will stand up to daily use while showcasing your personal design flair. Let your creativity lead the way and watch as your tired subfloor becomes a statement piece in your home.
Paint Subfloor: The Step-by-Step Guide to Painting
DIY subfloor painting is a great way to refresh your home without a major renovation. With the right subfloor paint options and techniques, even beginners can achieve a professional-looking finish. Let’s dive into a step-by-step guide that will cover everything from primer application to adding personal flair with stencils and ensuring long-lasting results.
Applying Primer for a Durable Base
Beginning your DIY subfloor painting project starts with the crucial step of laying down a strong primer. A reliable choice such as Zinsser’s Oil-Based Primer is essential for creating a durable base that enhances the adhesion of your subfloor paint colors. Remember to keep the area well-ventilated during this step to manage the fumes.
Laying Down the Base Color and Borders
Once the primer has set, it’s time to bring color to your project. Select a tint from Valspar latex porch and floor paint and apply it as the base. For a professionally finished look, apply painter’s tape to outline borders, and seal the tape with the base color to avoid bleed-through. Tips for painting subfloor include using smooth strokes and allowing for proper drying time between coats.
Creating Patterns with Stencils for a Personal Touch
Add a unique touch to your painted subfloor with stencils for a dose of personality and style. Secure your stencil design with painter’s tape and use a small foam roller for application. Achieve sharp, precise lines by carefully controlling the amount of paint on the roller.
Sealing Your Painted Subfloor for Longevity
Protect your hard work and ensure the longevity of your painted subfloor by applying a sealant like Rust-Oleum’s Water-Based Floor Finish in Satin. This not only increases durability but also gives your floor a professional-grade finish. For optimal protection, a good practice is to apply several coats of sealer, respecting the drying time in between.
For further guidance, here’s a comparison of recommended products for your DIY subfloor painting project:
| Product Type | Brand | Use Case | Finish |
|---|---|---|---|
| Primer | Zinsser’s Oil-Based Primer | Base coat for enhanced adhesion | Matte |
| Base Paint | Valspar Latex Porch and Floor Paint | Initial color layer | Varies |
| Stencil Paint | Valspar or similar quality brand | Decorative patterns | Matte/Glossy (depends on preference) |
| Sealant | Rust-Oleum’s Water-Based Floor Finish in Satin | Final protective coat | Satin |
By following these comprehensive steps and tapping into some creative painted subfloor ideas, your DIY subfloor painting project is sure to be a success. Choose the best paint for subfloor care to enjoy a stunning, revamped space that reflects your personality and stands the test of time.
Upkeep and Care for Your Newly Painted Subfloor
The journey to refurbishing your home with a beautiful painted subfloor doesn’t end with the last stroke of the brush. Ensuring the longevity and vibrance of your floor requires consistent but uncomplicated maintenance, echoing the necessary subfloor preparation before painting. With the best paint for subfloor locked in place, keeping the floor spotless means frequent cleaning with solutions that won’t degrade the paint. Namely, gentle detergents crafted for hardwood flooring will do the trick, allowing the glossy finish, characteristic of many Porch and Patio enamels, to be easily and safely cleaned.
After the rush and excitement of completing your painting project, patience remains a virtue. Allowing adequate dry time for your subfloor, typically a few hours for the surface to be dry to the touch, is just the start. A full cure, essential for the paint’s resilience, calls for a more extended wait before rearranging furniture. To add an accent of practicality and beauty, consider layering an area rug over your new flooring. Area rugs not just elevate the comfort underfoot and the room’s style, but they also play a protective role, minimizing the wear on frequently trodden paths thus preserving the paint’s pristine condition.
Specific areas of your home will inevitably experience more activity, and it is reasonable to anticipate the need for retouching to maintain the subfloor’s splendor. An occasional reapplication of sealant may be the best follow-up to your diligent subfloor preparation before painting. Like with any well-loved surface, prompt attention to scuffs or accidental spills helps your subfloor continue to make an impact. In essence, caring for your painted subfloor is not unlike caring for any favored room in your living space: keep it clean, treat it gently, and give it the extra attention it needs to stay as vibrant and welcoming as the day it was completed.